
如何使用gitea作为typora的图床?
注意
本文最后更新于 2025-06-30,文中内容可能已过时。
如何使用gitea作为typora的图床?
到PicGo官方github仓库的release下载对应平台的安装文件(选择有latest标签的),并进行安装(这里以Windows 11为例,安装过程省略)
typora配置PicGo的路径
- 打开typora软件,点击菜单栏的文件。

image-20220326211755455 2. 找到偏好设置(由于这个界面我截不了图所以这里就不放图了),点击箭头所指的文件夹。
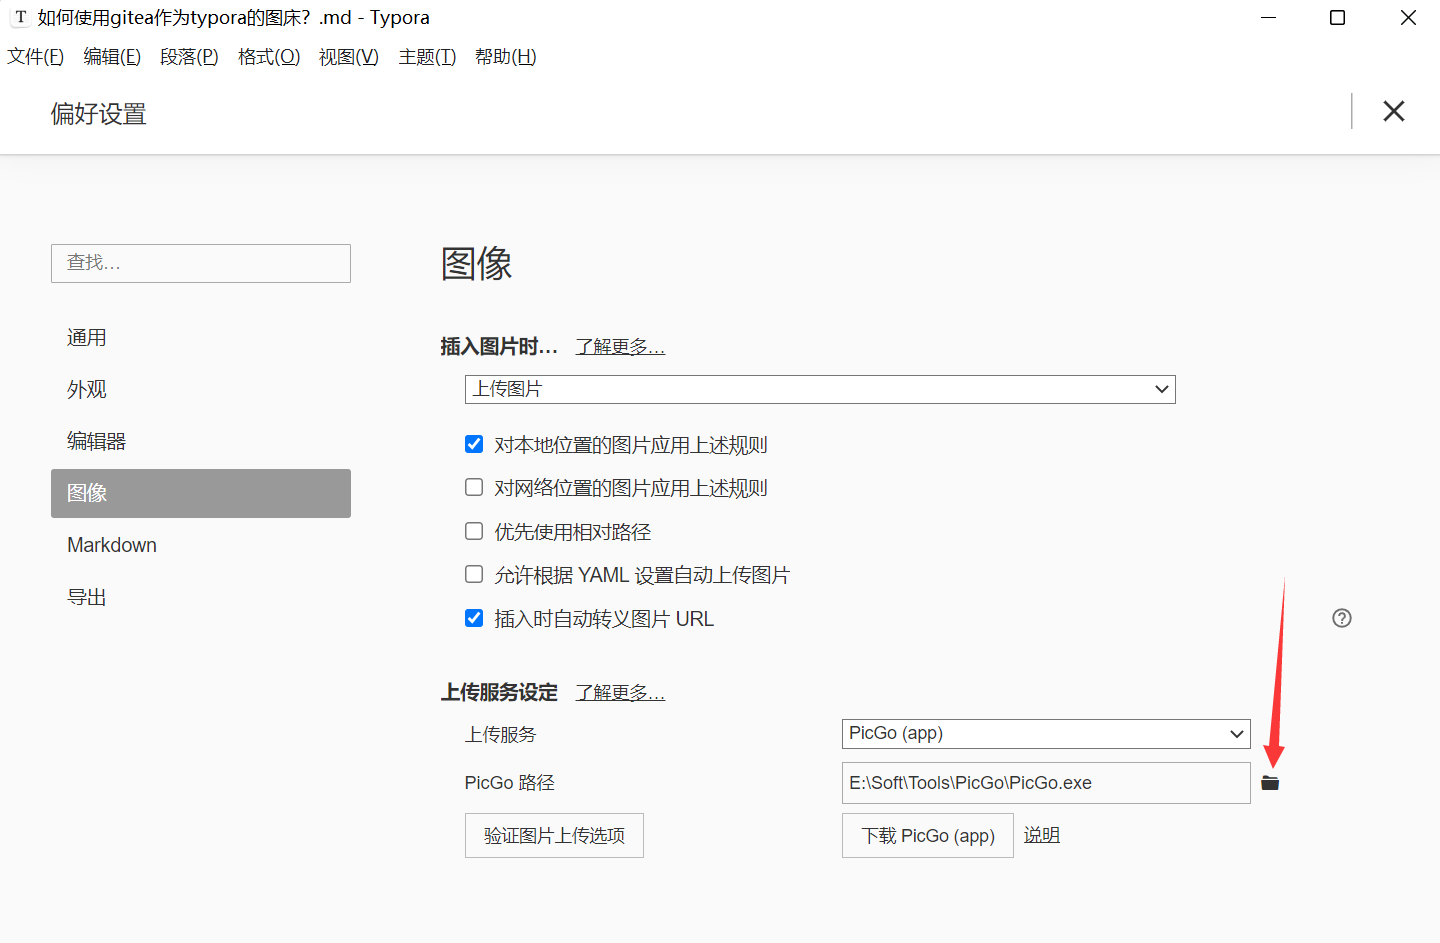
image-20220326212023263 选择picgo程序

image-20220326212250031
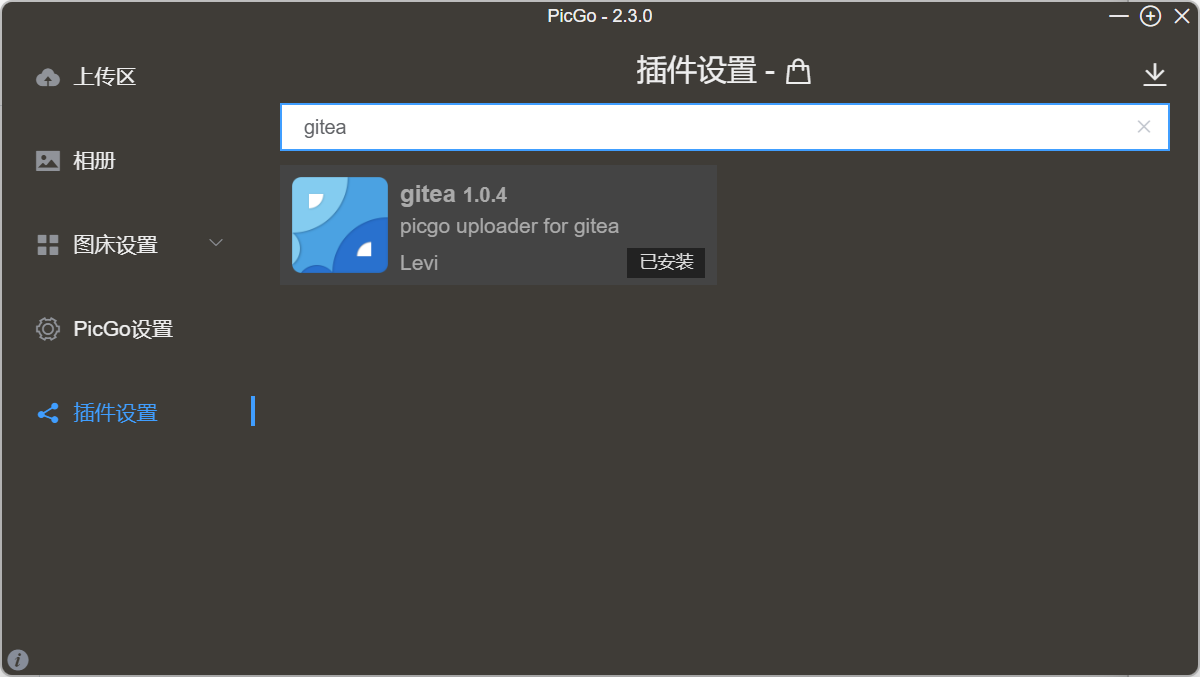
打开PicGo,下载gitea插件。

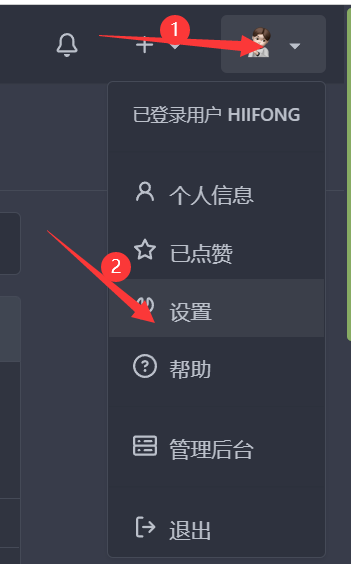
image-20220326212449573 创建gitea仓库,并完成第一次push
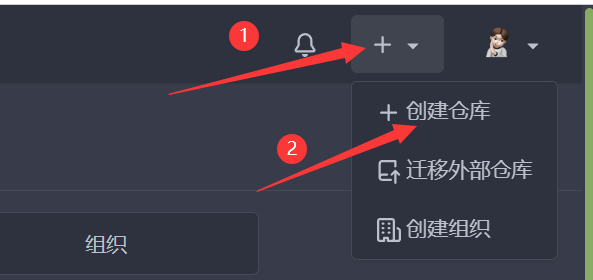
image-20220326214020556 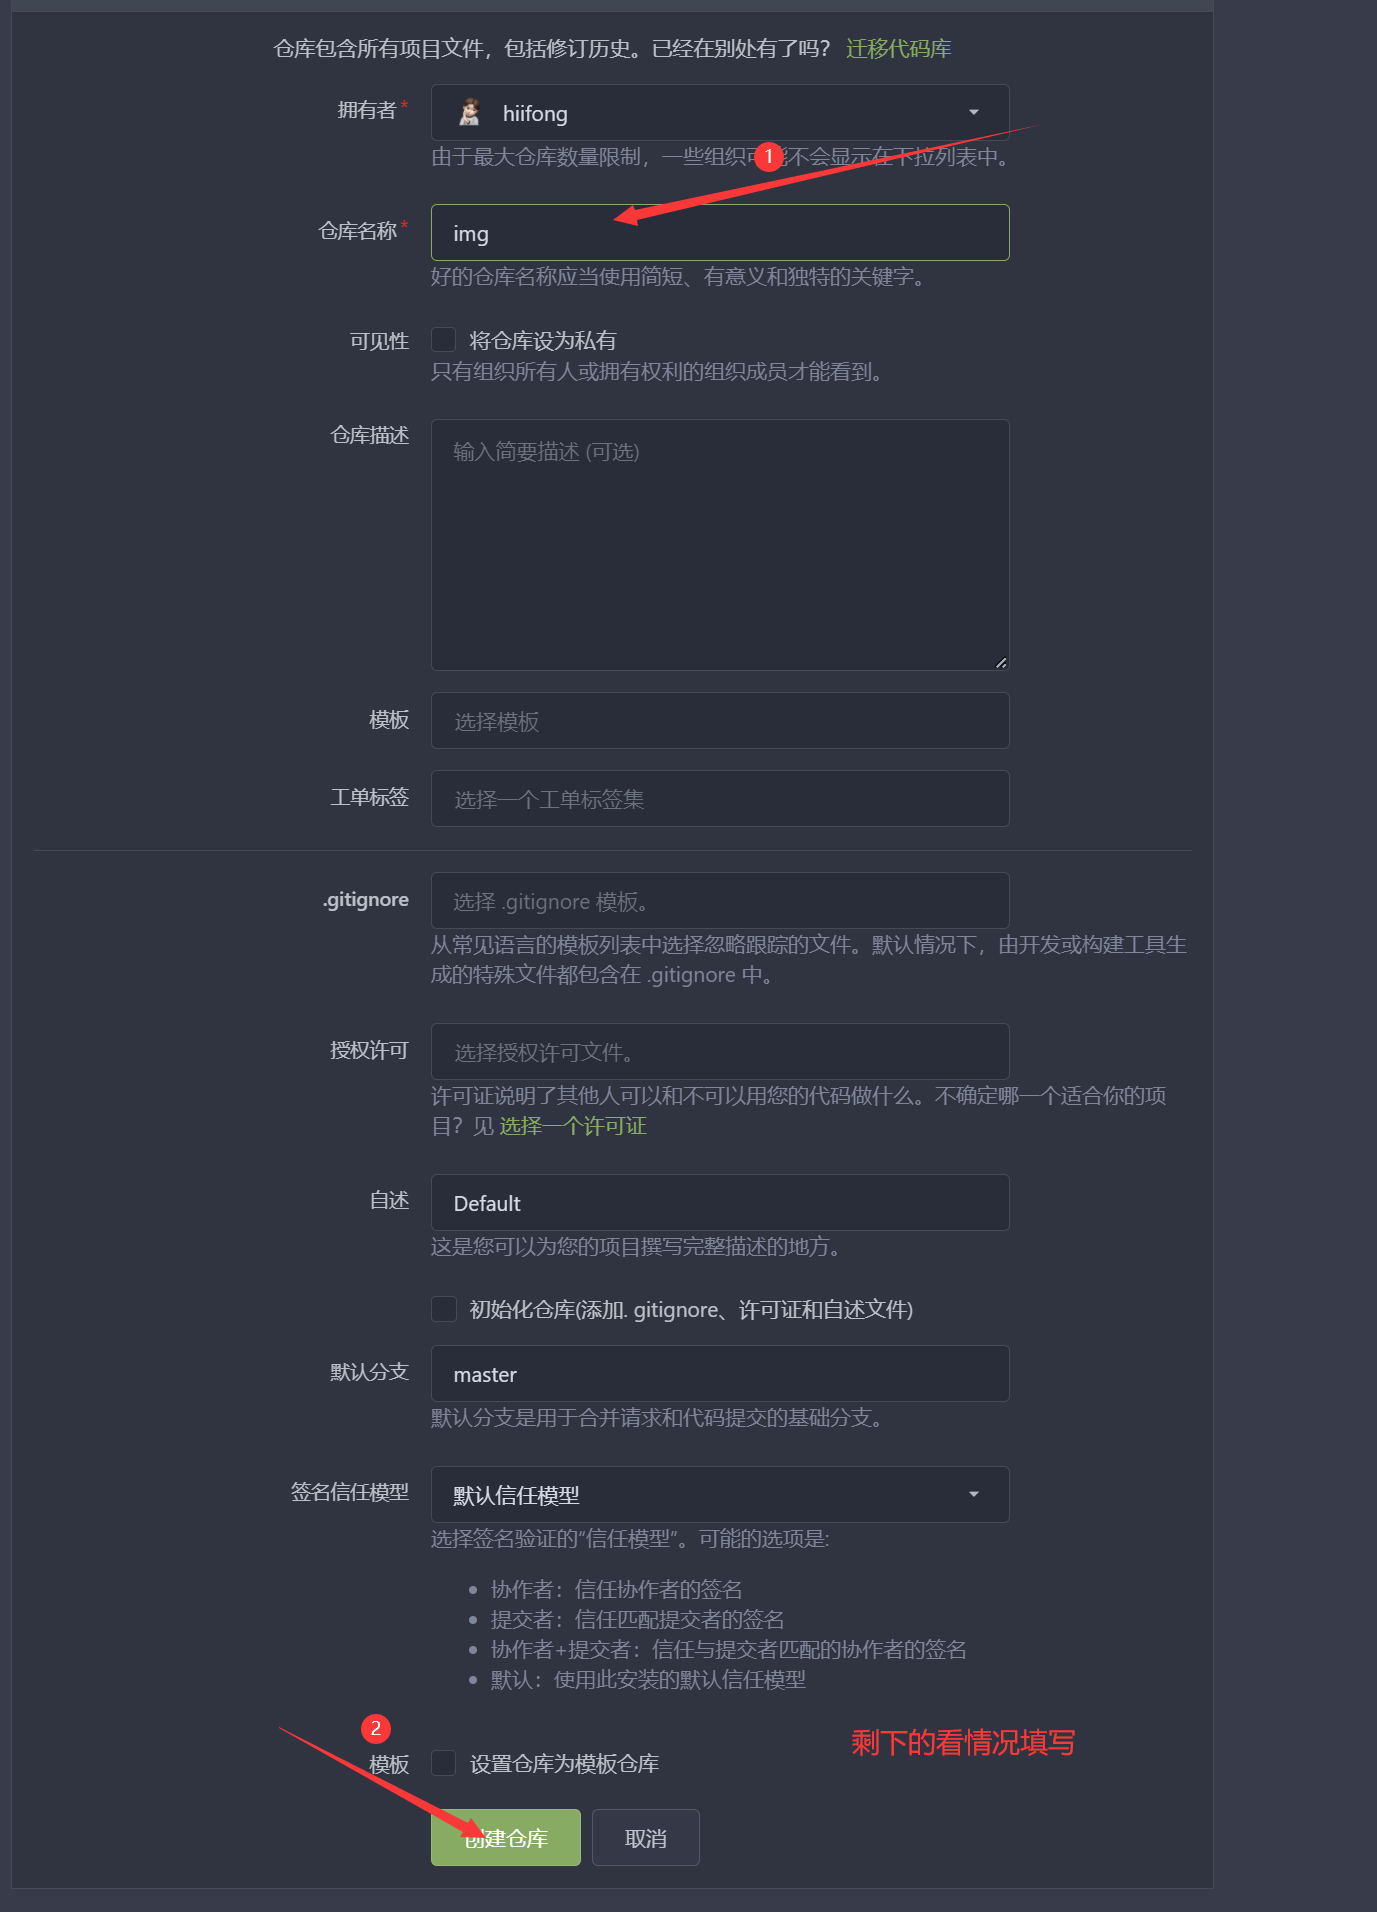
image-20220326214147688 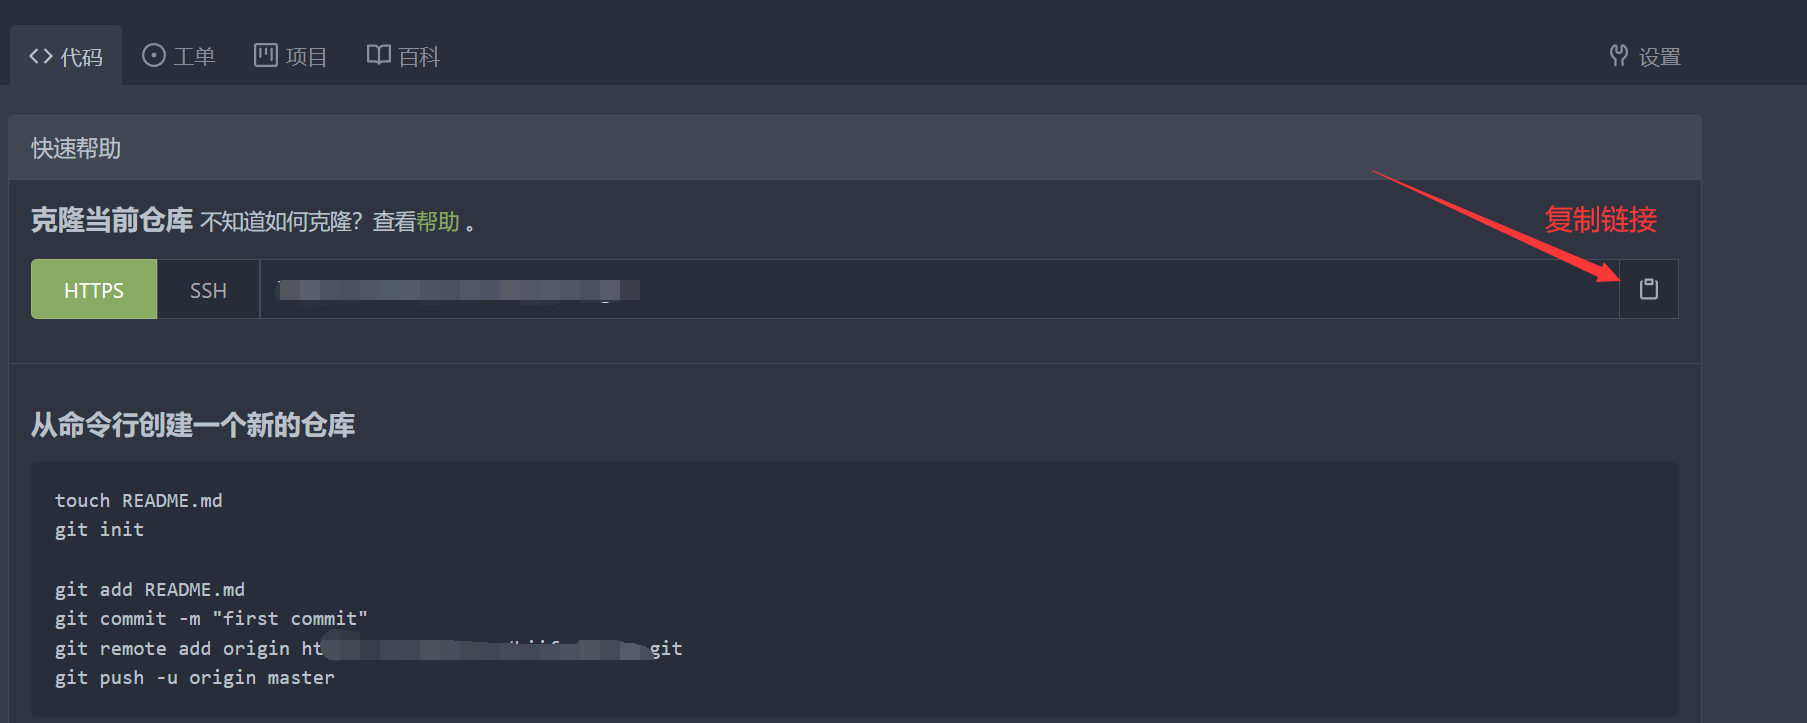
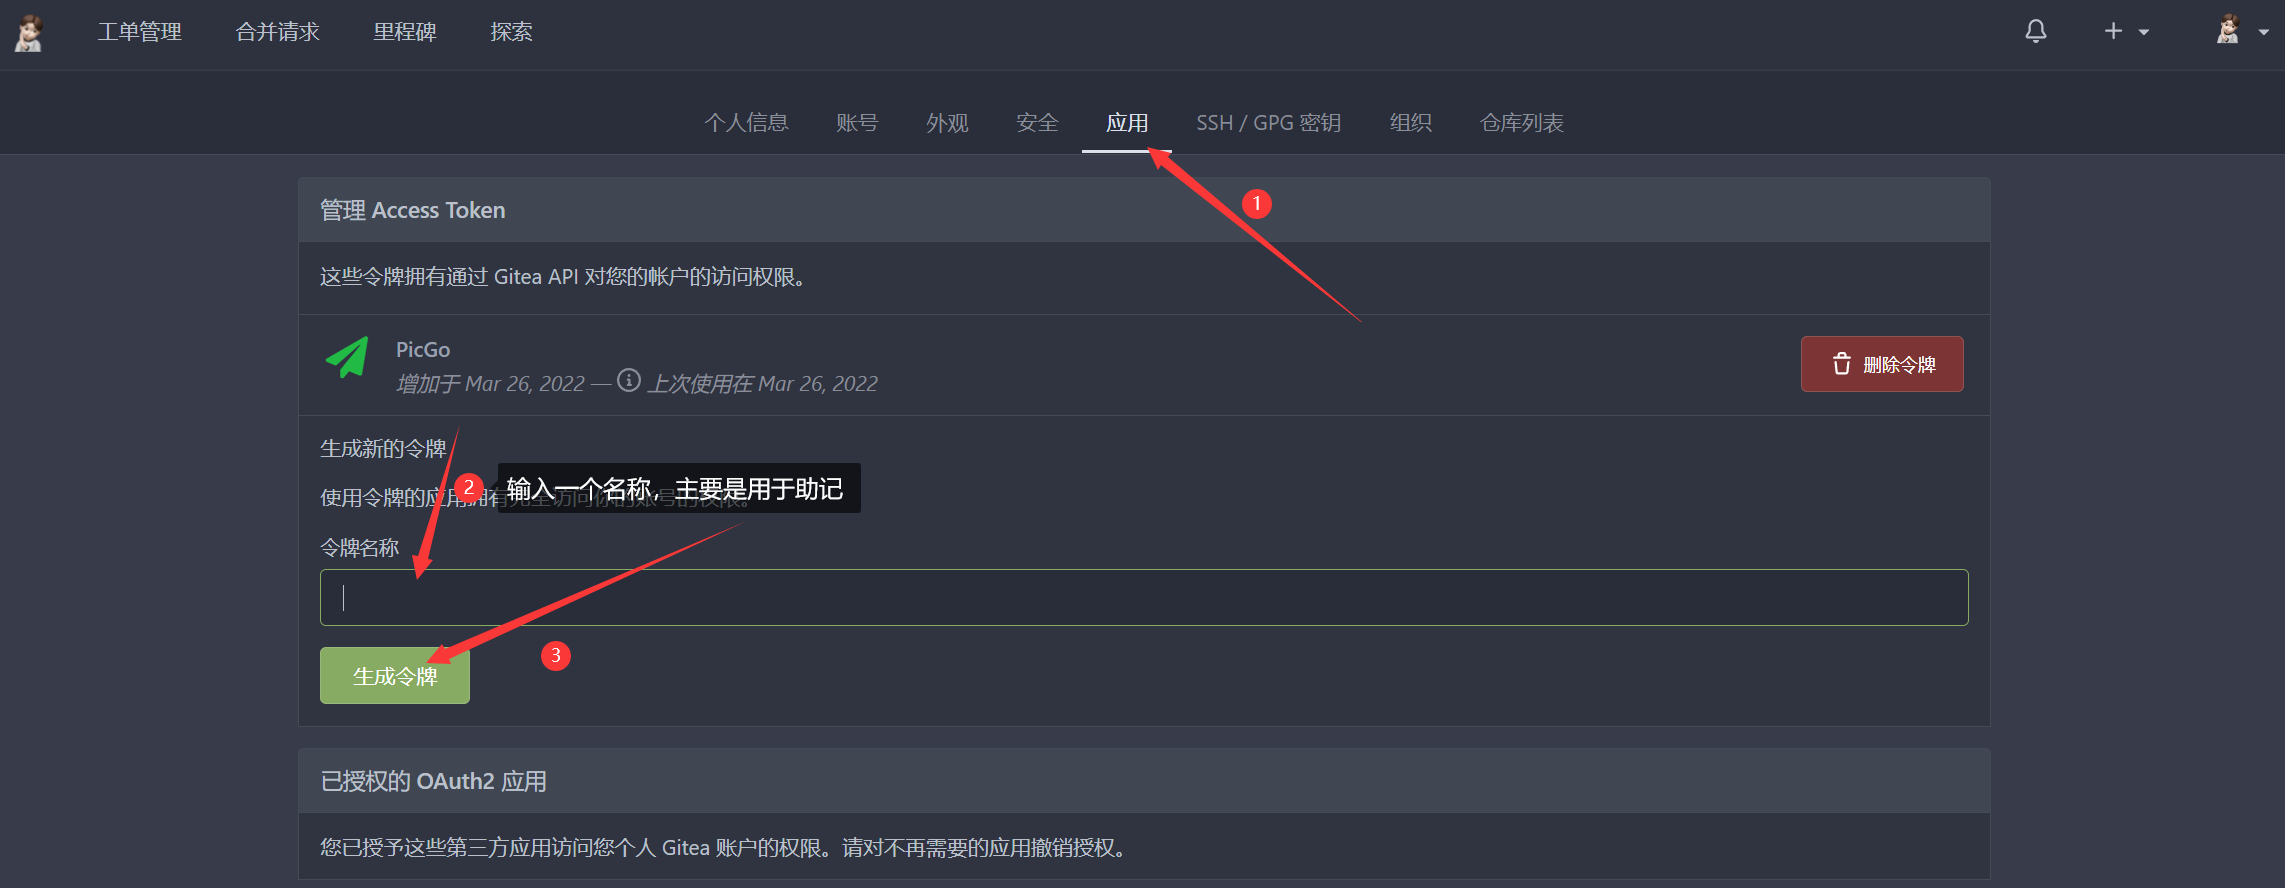
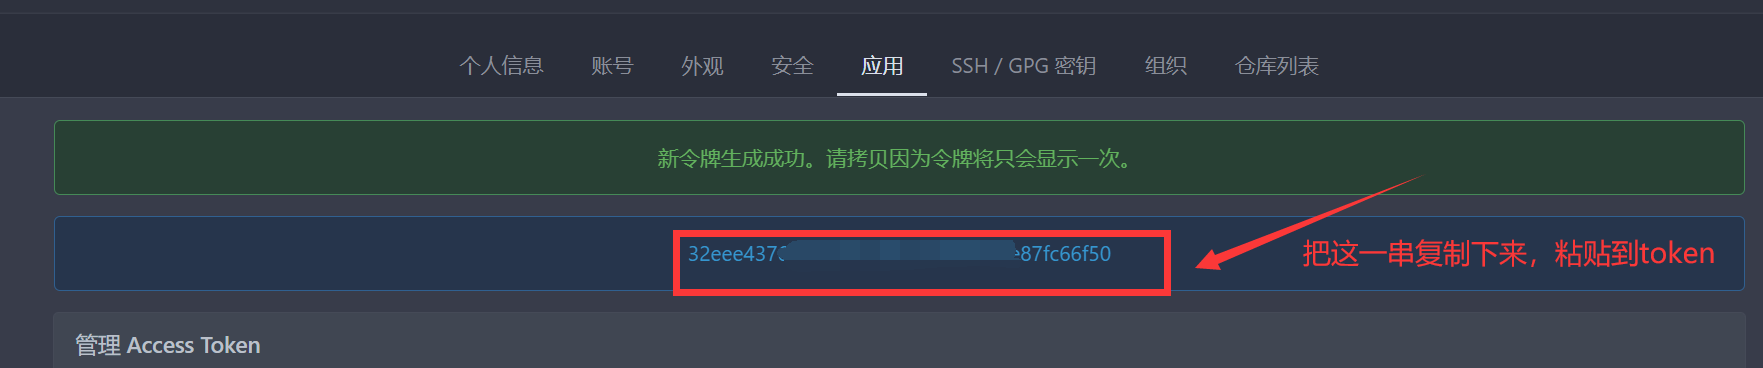
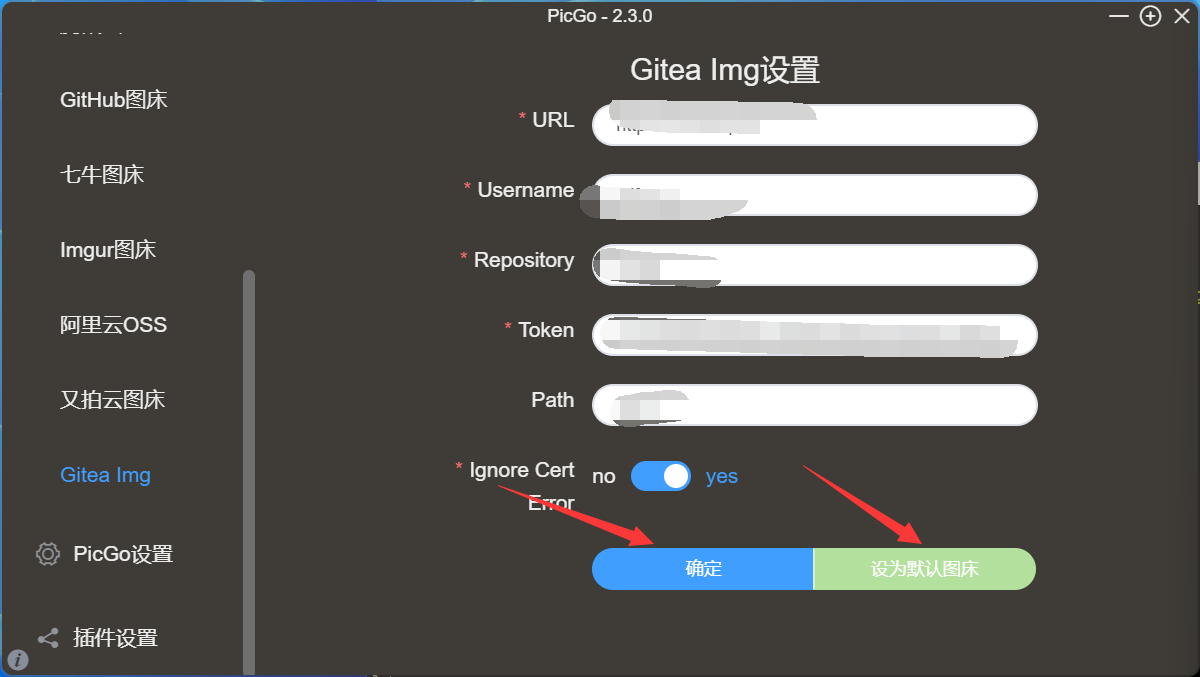
image-20220326214559116 1 2 3 4 5 6 7 8 9 10 11 12# 复制上面的代码,相应的调整一下 mkdir img cd img mkdir img cd img touch README.md cd .. git init git add . git commit -m "first commit" git remote add origin https://example.com/你的用户名/img.git git push -u origin master配置gitea插件,找到图床设置,打开Gitea Img进行配置。


| |
然后确认,也可以设为默认图床(建议设置)
最后验证一下配置。

image-20220326215435459

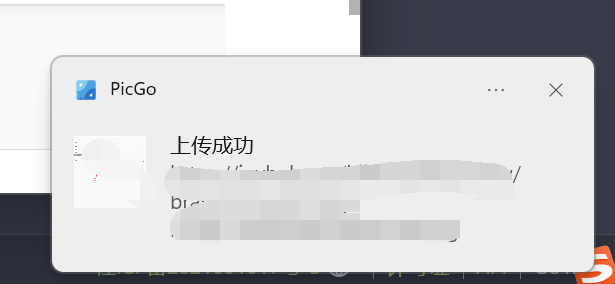
出现这个配置就没有什么问题。
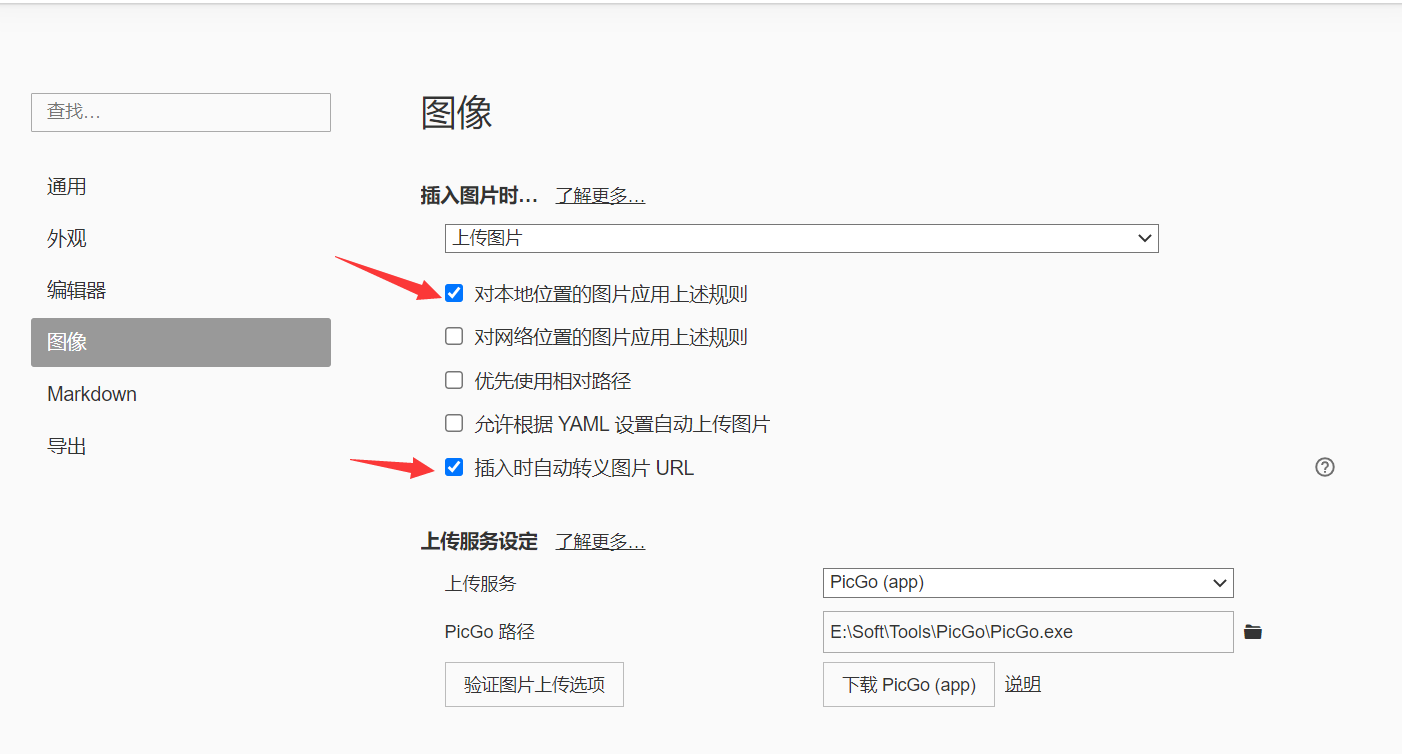
最后配置一下上传规则就可以了,然后粘贴图片到typora就会自动上传的gitea了。

image-20220326215842447
enjoy!
Buy Me a Coffee ~~
 支付宝
支付宝 微信
微信